Import the List of Devices from a Text File
Before you start: Create a list of
SNMP enabled devices and save it in a plain ASCII text
file (not UNICODE). This list can consist of only
switches if you so desire.
Each row in the text
file consists of switch
IP, device hostname, snmp version, community name - note
there are no spaces after the commas in this example
although spaces are allowed in the hostname:
10.20.61.97,SW-N20-61-97,2,SWITCH-V2-RO
10.20.61.94,SW-N20-61-94,2,SWITCH-V2-RO
10.20.61.95,SW-N20-61-95,2,SWITCH-V2-RO
10.20.61.96,SW-N20-61-96,2,SWITCH-V2-RO
10.22.0.5,SW-N22-0-5,SWITCH-V2-RO
10.22.0.6,SW-N22-0-6,2,SWITCH-V2-RO
Procedure to begin the import is shown below.
(click on the images on this page for a larger versions)
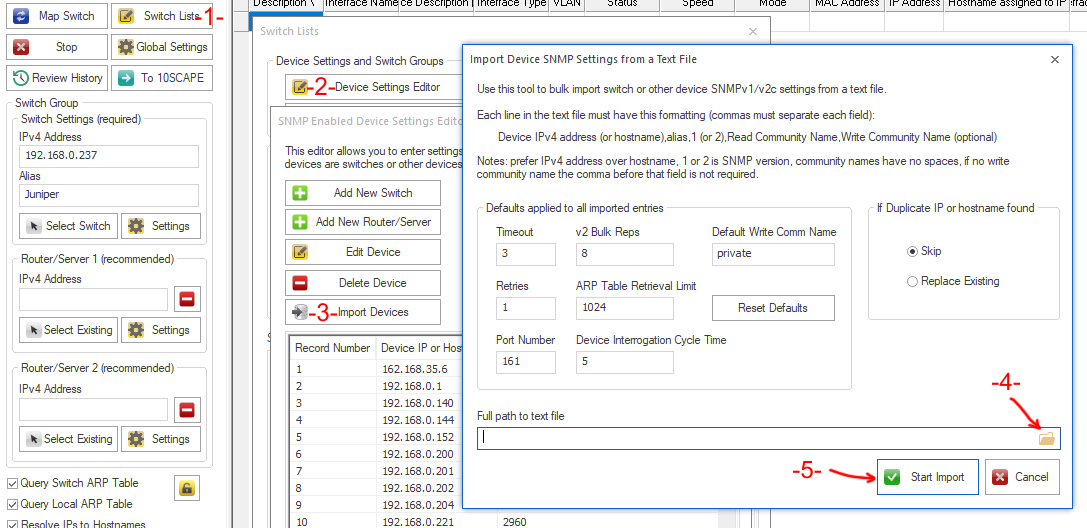
Locating the Device Import window and starting the import.
On the left side menu bar locate and click on 'Switch Lists' (1), then 'Device Settings Editor' (2), then 'Import Devices' (3), click on the folder (4) and navigate to your text file to import. Click on 'Start Import' (5) to begin.
Next Step: Creating a New Switch List
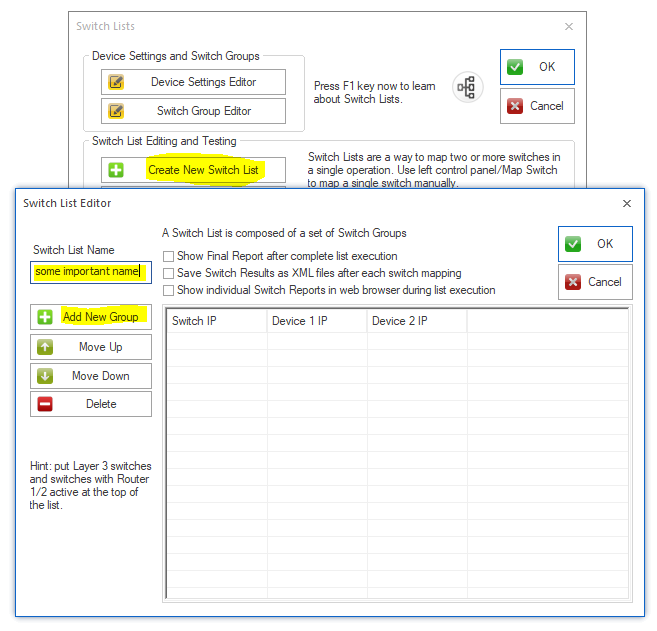
1. Creating a New Switch List
On the left side menu bar locate and press 'Switch Lists', then 'Create New Switch List', name your Switch List (note: the name cannot be changed later), then press 'Add New Group'.
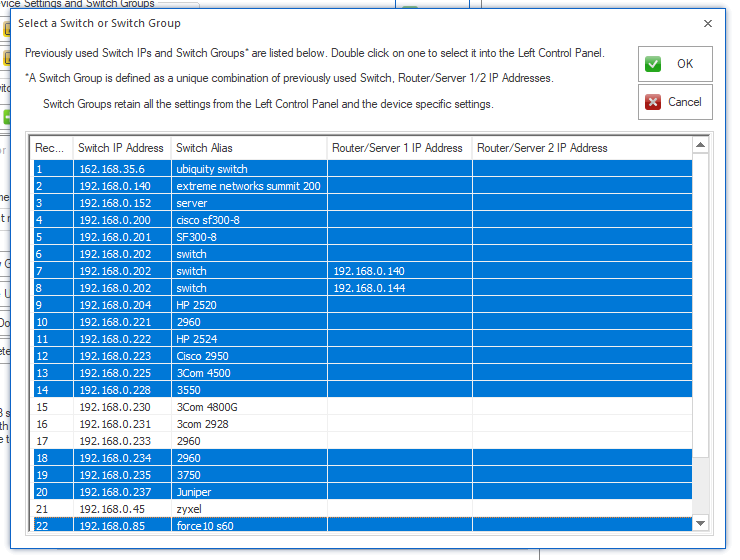
2. Selecting the Switch Groups for the Switch List
Multiselection is easily done with shift key or control key. When done with the items for the list press OK.
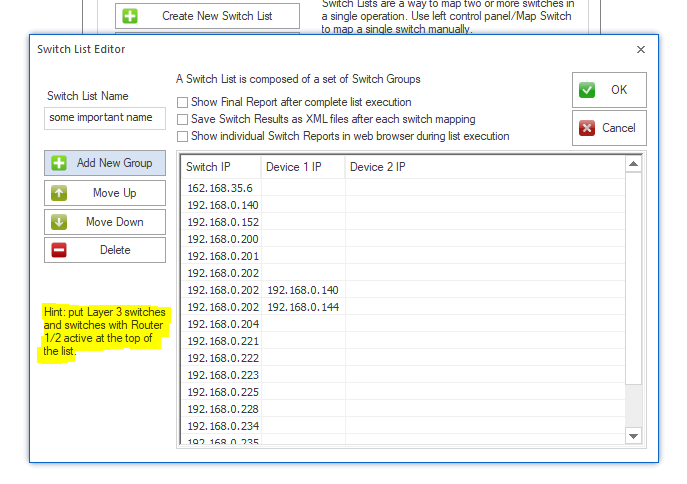
3. Finalize Editing the Switch List
Move Layer 3 switches and switches with Router/Server 1/2 entries to the top of the list by selecting and using move up/down, verify there are no duplicates and press OK to save the list.
How to Map the Switch List Manually
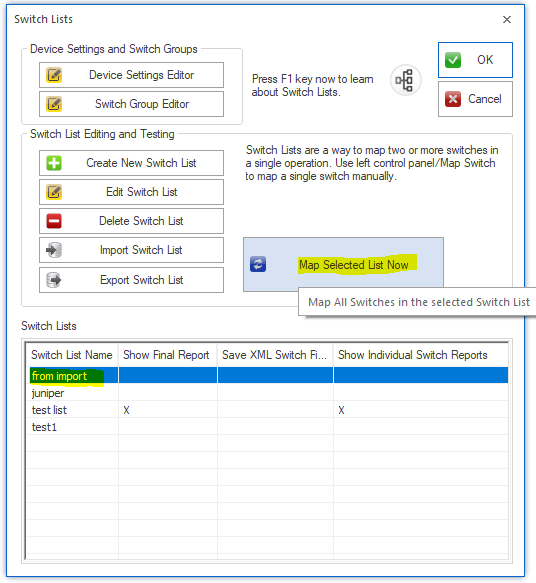
Mapping the Switch List
From the Switch Lists window, click and highlight the Switch List, then press Map Selected List Now. The progress will be shown in the grid and on the lower bar below the grid. A popup will notify you when the list is complete. If any switches cannot be accessed, a warning will come up - pressing Cancel during the warning will STOP the Switch List mapping process.
NetScanTools is a registered trademark of Northwest Performance Software, Inc.
'NetScanTools Pro', 'NetScanTools Standard', 'NetScanTools LE', 'ipPulse', 'Northwest Performance Software' and 'NetScanTools.com', are trademarks of Northwest Performance Software, Inc.
Any trademarked names mentioned herein are the property of their respective owners.
About Us
Email Us
Call Us
Help & Support Center
General Topics
Purchasing
Other Products
© 2024 Northwest Performance Software, Inc. All Rights Reserved. | Privacy Policy